eGPU Thunderbolt 4 Setup: 5 Best Upgrades for Faster External GPU Gaming
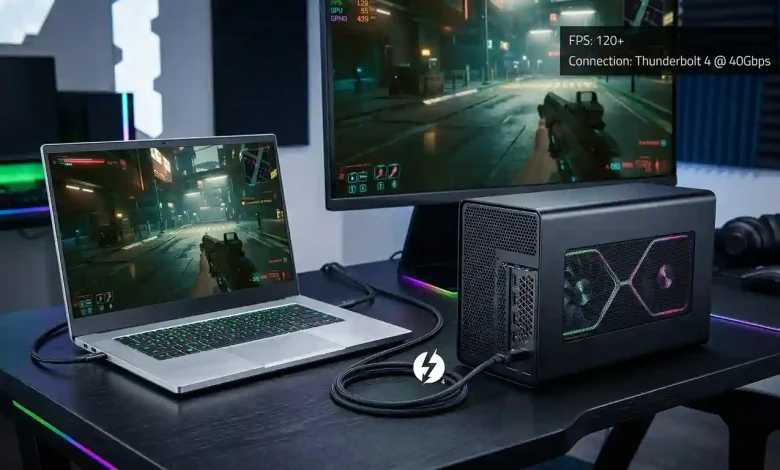
Table of Contents
eGPU Thunderbolt 4 Setup represents a compelling solution for gamers seeking to enhance their laptop’s graphical prowess without sacrificing portability. In an era where thin-and-light laptops dominate, integrating a powerful desktop-class graphics card externally via Thunderbolt 4 offers a significant performance boost for graphically demanding games and creative applications. This technology allows users to transform a portable machine into a formidable gaming rig when docked, providing a versatile and cost-effective alternative to purchasing a dedicated high-end gaming laptop or desktop PC. As the eGPU market continues its robust growth, driven by technological advancements and increasing demand from both gaming and professional sectors, understanding how to effectively set up and optimize a Thunderbolt 4 eGPU is becoming increasingly relevant for enthusiasts and professionals alike. The global eGPU market, valued at $1.3 billion in 2024, is projected to reach $4.2 billion by 2033, underscoring its expanding importance in the computing landscape.
Understanding the Synergy: eGPUs and Thunderbolt 4
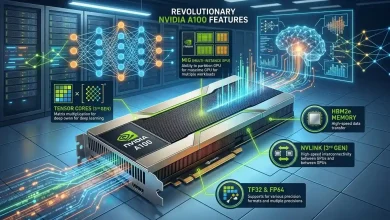
An eGPU, or external Graphics Processing Unit, is essentially a self-contained enclosure housing a full-size desktop graphics card, typically from the NVIDIA GeForce RTX or AMD Radeon RX series. It connects to a laptop or compact PC through a high-speed interface like Thunderbolt, offloading graphics processing and dramatically improving performance for gaming, 3D rendering, and video editing. The core idea is simple: leverage unused Thunderbolt bandwidth to route PCIe data between the host device and a powerful GPU, enabling users to upgrade graphics without replacing their entire system.
Thunderbolt 4, the successor to Thunderbolt 3, plays a pivotal role in enabling this external graphics revolution. While Thunderbolt 3 already offered a robust 40Gbps maximum theoretical throughput, Thunderbolt 4 standardized and refined this connectivity, ensuring consistent performance and compatibility. Crucially, Thunderbolt 4 supports PCIe tunneling up to 32Gbps, which is equivalent to a PCIe 3.0 x4 connection. This bandwidth is critical for the smooth communication between your laptop and the eGPU, enabling desktop-level graphics performance.
One of the key advantages of Thunderbolt 4 over some earlier Thunderbolt 3 implementations lies in its architectural improvements. With Thunderbolt 4, controllers are often integrated directly into the CPU of newer Intel models (11th generation and newer), which helps to reduce latency compared to setups where the Thunderbolt controller is routed through a Platform Controller Hub (PCH). This lower latency is a significant benefit for gaming, where every millisecond can impact responsiveness and overall experience. However, it’s important to note that despite the impressive bandwidth, this PCIe 3.0 x4 equivalent still represents a limitation compared to the PCIe 3.0 x16 or PCIe 4.0 x16 connections available in a traditional desktop motherboard, which can lead to a performance overhead.
Essential Components for Your eGPU Thunderbolt 4 Setup
To embark on your high-speed gaming journey with an eGPU Thunderbolt 4 setup, you’ll need several key components:
- Compatible Laptop or PC: The most crucial requirement is a laptop or PC equipped with a Thunderbolt 4 port. While many modern ultrabooks and premium laptops feature Thunderbolt 3 or 4, it’s essential to verify your specific model’s eGPU compatibility before investing in hardware. Some gaming laptops might even disable internal GPUs when external graphics are connected, potentially offering better performance.
- eGPU Enclosure: This is the housing for your desktop graphics card. Modern enclosures come with their own power supply, cooling solutions, and the necessary Thunderbolt connectivity. Popular options in 2026 include the Razer Core X Chroma, known for its 700W PSU, tool-free installation, and comprehensive I/O. Other notable enclosures include the GMKtec AD-GP1 (often with an integrated GPU like the RX 7600M XT, compact, dual USB4/OCuLink connections), Cooler Master MasterCase EG200, AKiTiO Node Titan, and Bosgame GVP7600. Some enclosures like the Razer Core X V2 are even designed with Thunderbolt 5 in mind, offering future-proofing, though they will operate at Thunderbolt 4 speeds if connected to a Thunderbolt 4 host.
- Graphics Card: The heart of your eGPU setup. You’ll need a desktop-class graphics card from NVIDIA’s GeForce RTX series or AMD’s Radeon RX series. The choice depends on your budget, performance targets, and specific game requirements. For high-speed gaming, newer generation cards like the RTX 4080 or Radeon RX 7900 XT are often recommended, provided your enclosure’s power supply and physical dimensions can accommodate them. While NVIDIA cards are often cited for easier setup and better performance with features like ray tracing and frame generation, AMD cards can offer a strong price-performance balance, especially when paired with an AMD CPU.
- Thunderbolt 4 Cable: A high-quality, certified Thunderbolt 4 cable is indispensable for maintaining stable and fast data transfer between your laptop and the eGPU enclosure.
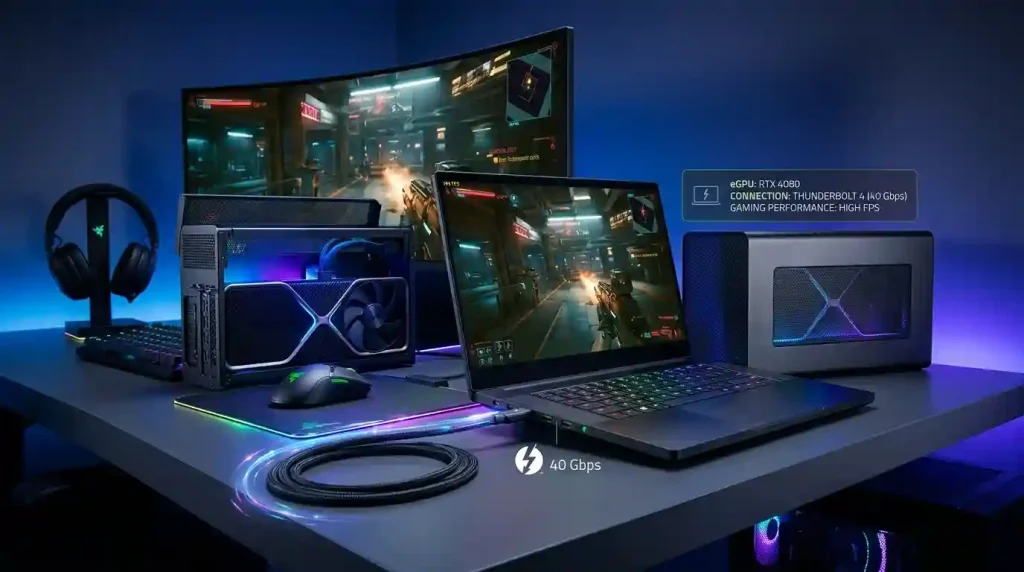
- External Monitor: For optimal performance, it is highly recommended to connect an external monitor directly to the eGPU enclosure. This bypasses the need for the graphical data to travel back through the Thunderbolt cable to the laptop’s internal display, significantly reducing latency and improving frame rates.
Step-by-Step Guide: Building and Connecting Your eGPU
Setting up an eGPU Thunderbolt 4 system can appear daunting, but by following a systematic approach, you can achieve a powerful external graphics solution. Here’s a detailed guide:
- Install the Graphics Card into the Enclosure: If your eGPU enclosure does not come with a pre-installed graphics card, carefully install your chosen GPU into the enclosure’s PCIe slot. Most modern enclosures feature a tool-free design, simplifying this process. Ensure the card is securely seated and any auxiliary power connectors are properly attached from the enclosure’s power supply.
- Connect Power to the eGPU Enclosure: Plug the eGPU enclosure’s power supply into a wall outlet. Ensure the power supply capacity is sufficient for your chosen graphics card, with 400W or higher often recommended for optimal performance.
- Update Your Laptop’s System Software: Before connecting the eGPU, ensure your laptop’s BIOS, Thunderbolt firmware (NVM), and Windows version are all up to date. Visit your laptop manufacturer’s website for the latest updates. You can check your BIOS version by typing “msinfo32” in the Windows search bar, and your Windows version by typing “winver.exe”.
- Install Thunderbolt Control Center: Download and install the Thunderbolt Control Center application from the Microsoft Store. This software is crucial for your computer to properly recognize and manage Thunderbolt devices.
- Connect the eGPU to Your Laptop: Use a certified Thunderbolt 4 cable to connect the eGPU enclosure to your laptop’s Thunderbolt 4 port. Upon connection, your laptop should recognize the new Thunderbolt device, and the Thunderbolt Control Center should display the eGPU.
- Install Graphics Card Drivers: Once the eGPU is connected and recognized, download and install the latest desktop drivers for your specific graphics card (NVIDIA or AMD) directly from the manufacturer’s website. It’s often recommended to disable Windows driver updates for the GPU to prevent conflicts, especially if you have an integrated GPU from a different vendor.
- Restart Your Laptop: After driver installation, restart your laptop to ensure all changes take effect and the eGPU is properly initialized.
Optimizing Your eGPU Thunderbolt 4 Setup for Peak Gaming Performance
While an eGPU significantly boosts graphical capabilities, optimization is key to unlocking its full potential for high-speed gaming. Several strategies can help maximize your frame rates and minimize latency:
- Use an External Monitor Connected Directly to the eGPU: This is arguably the most critical optimization. Connecting your gaming monitor directly to the eGPU’s DisplayPort or HDMI output bypasses the need for the processed frames to travel back through the Thunderbolt cable to the laptop’s integrated display. This redirection significantly reduces latency and can lead to substantial performance gains, often 20-50% or more, depending on the game and resolution. Playing on the laptop’s internal screen means the data goes GPU → Thunderbolt → Laptop CPU → Laptop iGPU → Internal Display, adding considerable overhead and latency.
- Disable the Laptop’s Integrated GPU (dGPU): If your laptop has a dedicated internal GPU (dGPU) in addition to an integrated one, disabling it in Device Manager can sometimes prevent conflicts and improve the eGPU’s performance by ensuring all graphical tasks are handled by the external unit.
- Ensure a GPU-Bound Workload: eGPUs are most effective when the bottleneck is primarily the GPU. If your laptop’s CPU or RAM is insufficient for the game you’re playing, even a powerful eGPU may not provide the expected performance gains.
- Enable Hardware-Accelerated GPU Scheduling: In Windows settings, navigate to System > Display > Graphics settings, and turn on “Hardware-accelerated GPU scheduling” and “Optimizations for windowed games” for improved resource management.
- Set Power Mode to Best Performance: In your laptop’s power options, ensure the mode is set to “Best Performance” to prevent any throttling of the CPU or Thunderbolt connection.
- Consider GPU Settings and Overclocking: Fine-tune in-game graphics settings to balance visual quality with frame rate. For experienced users, minor overclocking of the eGPU’s graphics card can yield additional performance, though caution is advised.
Here’s a comparison of popular eGPU enclosures available in 2026, highlighting their key features:
| Enclosure Model | Key Features | PSU Wattage | Connectivity | Compatibility Notes |
|---|---|---|---|---|
| Razer Core X Chroma | Tool-free GPU installation, RGB lighting, additional I/O (USB, Ethernet) | 700W | Thunderbolt 3/4 | Wide Windows/macOS compatibility, premium build |
| GMKtec AD-GP1 | Compact, lightweight, often with integrated RX 7600M XT, multi-display support, M.2 storage expansion | Integrated GPU power | USB4/OCuLink | Ideal for mobile users, quiet operation |
| Cooler Master MasterCase EG200 | Dedicated PSU, tool-free design, laptop charging | 550W (typical) | Thunderbolt 3/4 | Good thermals, versatile |
| AKiTiO Node Titan | Portable design, 650W PSU, 100W laptop charging | 650W | Thunderbolt 3/4 | Supports larger GPUs, robust for creative pros |
| Sonnet eGPU Breakaway Box 750ex | High power delivery, additional USB ports, Ethernet | 750W | Thunderbolt 3/4 | Reliable, supports high-end GPUs |
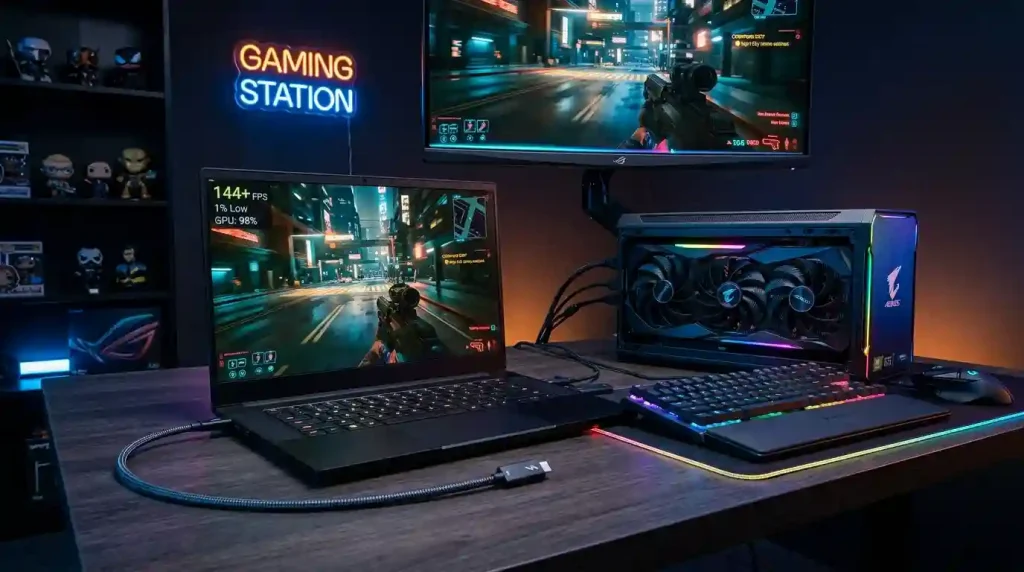
Benchmarking and Real-World Gaming Experience with eGPUs
The real-world performance of an eGPU Thunderbolt 4 setup for gaming is a complex interplay of factors, including the specific laptop CPU, the chosen graphics card, the eGPU enclosure, and crucially, whether an external monitor is used. While an eGPU can provide a significant uplift over integrated graphics, it’s important to manage expectations and understand the inherent performance overhead compared to a desktop PC with a natively installed GPU.
Typically, an eGPU setup can deliver anywhere from 70% to 90% of the graphics card’s potential desktop performance. This performance delta is primarily due to the bandwidth limitations of Thunderbolt 4 (PCIe 3.0 x4 equivalent) and the latency introduced by the Thunderbolt controller’s encoding and decoding process. For instance, a Reddit discussion highlights that even with a powerful card like the RTX 5090, running it in a Thunderbolt 4 eGPU enclosure with the laptop screen can yield significantly lower FPS compared to using a PCIe 5 enclosure with an external screen, potentially more than doubling the frame rate in some games.
For demanding games at 1440p or 4K resolutions, an eGPU can offer substantial improvements over integrated laptop graphics, often enabling playable frame rates that were previously unachievable. For instance, testing has shown performance improvements up to 340%, taking frame rates from 24fps to 106fps in demanding games like Cyberpunk 2077 with the right external GPU setup. Creative professionals using applications like DaVinci Resolve or Blender on high-end ultrabooks can also expect meaningful enhancements, albeit with an average performance loss of about 10-15% compared to internal desktop GPUs.
However, for mainstream gamers targeting 1080p on their laptop display, the gains might be less meaningful, and they may even experience increased latency and inconsistency. The type of game also matters; CPU-heavy titles may show less improvement with an eGPU, as the bottleneck shifts from the GPU to the laptop’s processor. Competitive gamers, who are highly sensitive to input lag, might also find the slight increase in latency from the Thunderbolt connection to be a factor.
Navigating the Nuances: Limitations and Key Considerations
While an eGPU Thunderbolt 4 setup offers undeniable advantages, it’s crucial to acknowledge its limitations and consider them carefully before making an investment:
- Bandwidth Bottleneck: As discussed, Thunderbolt 4’s PCIe 3.0 x4 equivalent bandwidth is a primary limitation. This means a desktop-class GPU in an eGPU enclosure will generally not perform identically to the same GPU installed directly in a desktop PC’s x16 PCIe slot. The “bottleneck in most eGPU setups isn’t the enclosure – it’s the PCIe lanes available through the cable. Thunderbolt 3 and 4 both cap at PCIe 3.0 x4, which hands roughly 22% of the bandwidth a desktop slot uses to the same card.”.
- Latency: The encoding/decoding process by Thunderbolt controllers introduces latency, which can impact gaming performance and responsiveness, especially when using the laptop’s internal screen. While Thunderbolt 4’s integrated controllers help, it’s still a factor to consider.
- Cost: eGPU enclosures and high-end graphics cards represent a significant investment. For many, a dedicated gaming desktop or a gaming laptop with a powerful discrete GPU might offer a more cost-effective solution with superior raw performance for the price.
- Compatibility Issues: Not all laptops with Thunderbolt ports are officially compatible with eGPUs, and driver conflicts, especially when mixing iGPUs and eGPUs from different vendors (e.g., AMD iGPU with NVIDIA eGPU), can be a challenge. macOS users also face specific compatibility restrictions, primarily supporting certain AMD GPU models.
- Thunderbolt 5 and OCuLink: While Thunderbolt 5 (80Gbps, PCIe 4.0 x4 equivalent) and OCuLink (potentially higher bandwidth and lower latency) are emerging technologies, they are not yet widely adopted and still present their own set of considerations. OCuLink, for instance, offers superior raw bandwidth and lower latency compared to Thunderbolt for PCIe tunneling, but typically lacks hot-plugging capabilities and multi-functionality, making it less versatile as a general docking solution. As of 2026, Thunderbolt 4 remains the most prevalent and practical standard for eGPUs. To learn more about the underlying technology, you can refer to the Wikipedia article on Thunderbolt (interface).
- Portability Trade-offs: While eGPUs offer portable graphical power, the enclosure itself, along with the graphics card and power supply, adds considerable bulk. This setup is best suited for a stationary “docked” experience rather than frequent travel.
Conclusion: The Future of Portable Gaming Power
The eGPU Thunderbolt 4 Setup stands as a powerful testament to the evolving landscape of PC gaming and computing. For users seeking to unlock high-speed gaming performance from their thin-and-light laptops, an eGPU offers a compelling and increasingly refined solution. Thunderbolt 4’s standardized 40Gbps bandwidth and reduced latency, especially with CPU-integrated controllers, provide a robust pipeline for external graphics, transforming portable machines into potent gaming workstations when needed. While limitations in raw bandwidth and inherent latency compared to a desktop PC persist, strategic optimizations—such as utilizing an external monitor connected directly to the eGPU—can significantly close the performance gap. The market for eGPUs is flourishing, with a variety of sophisticated enclosures and powerful graphics cards available to cater to diverse needs and budgets. As technology continues to advance, and with the gradual emergence of standards like Thunderbolt 5 and OCuLink, the performance ceiling for external graphics will undoubtedly continue to rise. For gamers and creative professionals who value both portability and raw graphical power, the eGPU Thunderbolt 4 setup remains a highly viable and increasingly attractive path to desktop-class performance.